I’ve decided to follow this project right from the start. Those of you who have similar goals for your looms can Weave ALong. If you do, please post links to your blog or Rav post, wherever you keep track of things. We’ll all want to see!
Keep in mind that while I have woven several garments for myself, I am certainly not an expert so we’ll be learning as we go. I might declare something an absolute fact one day and have to recant the next so don’t hold me to anything just yet!
But there are a few things I’m pretty sure of.
!. Start at the beginning. You need your loom and an idea of what you want to make. Here’s my start.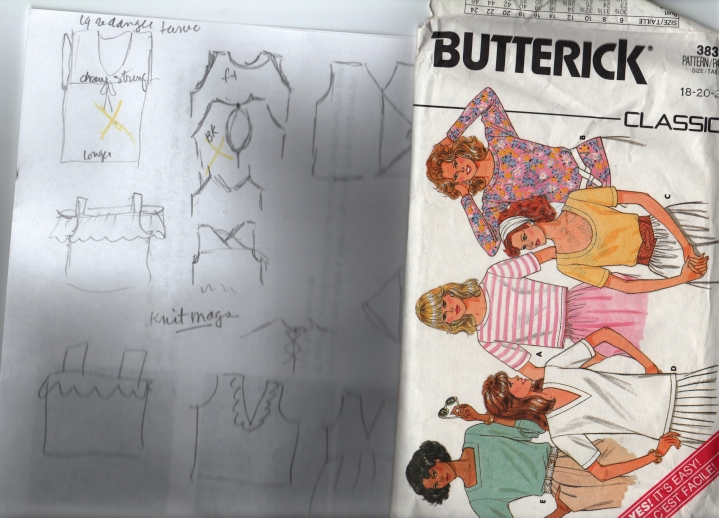
I went though knitting books and catalogs and watched what other people were wearing, keeping note of those things I thought might be possible to make with the small looms. The sketches above are some of the ideas I noted down. Not all suitable for the looms or for me but you want to make copious notes to start so you have something to work with. Find a sewing pattern that fits you. Try thrift store if you don’t have one on hand, they’re pretty pricy these days. It doesn’t have to be a fashionable pattern, just a pretty simple one that has the correct measurements. (You do know you’re going to have to measure yourself, too, or get a buddy to. Don’t try fudging here, you won’t like the results and you’re going to have a lot of hours in this project.)
I decided on the tunic at the top left, It has a draw string at the under-breast line that is going to be purely decorative in my case and may even be left out once I see how it looks. But I wanted it fingertip length and fairly simple. One thing that may be added is three quarter sleeves. Right now I do not have enough yarn for sleeves, but I really prefer them. Between being fat and old my arms are not all that attractive. (A good reason for you younger ladies to get rid of any excess now, while the loosing is easy- or easier, anyway). But back to the subject. I picked my style and found a pattern that is pretty close to what I want and that is tested to fit me. This is the same one I used for the jacket. Next comes the math. I bought a lot of Blue Sky alpaca at a good price last year and wanted to use that if possible. I wove a square. This is your swatch to test your gauge. Wash, dry, measure. Now you can figure how many blocks you are going to need to make the fabric to fit the pattern. If you aren’t sure how much yarn it takes to weave your block, check my web site, there’s a list of looms and how much each takes. Don’t forget you’re going to need yarn for sewing your project together so allow quite a bit of extra. If you are going to be knitting or crocheting trim, you’ll need to account for that, too.
Okay, Next thing is a project bag. This keeps all the bits and pieces in one spot so you don’t lose them between weaving sessions. Don’t kid yourself that you’ll remember what closet you put your loom in and which drawer the pattern is in and which bag the yarn is in and etc etc. Keep it together. Here’s mine.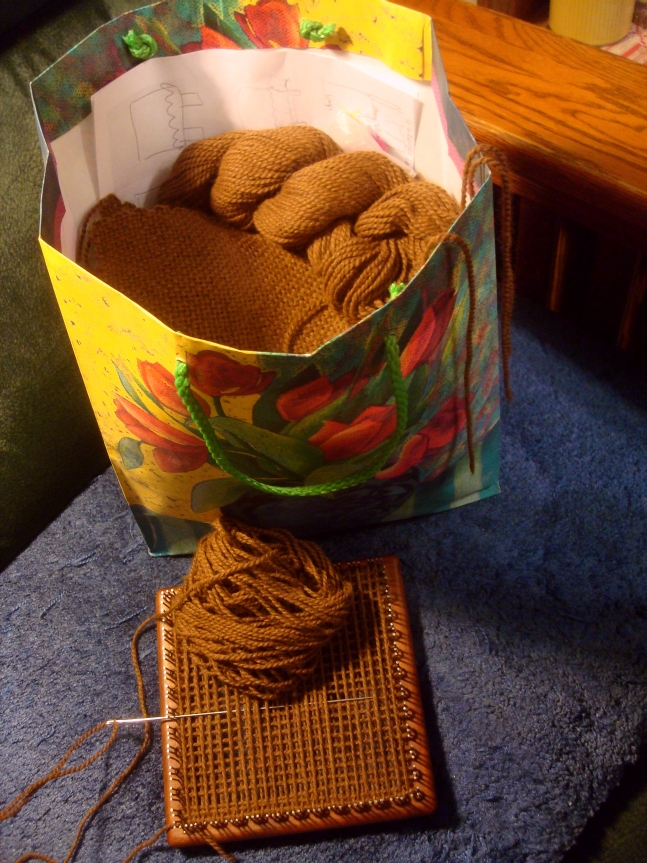
So that’s it for this session. Himself is grumbling where’s dinner. I’ll spend the evening weaving squares and thinking about this project. If you have questions or ideas to help, you can post here or email me. dorleska at tds dot net. I would really like to hear your feedback.
