We’re heading off pretty soon for Albany, Oregon and the Black Sheep Gathering. We’ll have the booth all weekend, of course and I’ll have beginning Pin loom weaving class Sunday afternoon, if you know anyone in the area who wants to learn. After that we head to Viola, Idaho and the Grazing hills Fiber Arts Festival. This is a new show and the ladies have worked very hard to make this a good one. I’ve offered two classes there. The same beginning pin loom class and also weaving a dishcloth on the 10.5″ Quilt Weaver square. Check them out.
Tag Archive | square loom
Pants WAL
Okay, got the pants done and got the pattern written up and on the web site project page. If you have any questions you can find me here or on Rav. I may not see your question on facebook so Ravelry Looms To Go is your best bet. Anyway here is the link and I do hope to see some of you Keeping Your Pants On! https://www.hazelroselooms.com/projects/
A WAL/DAL
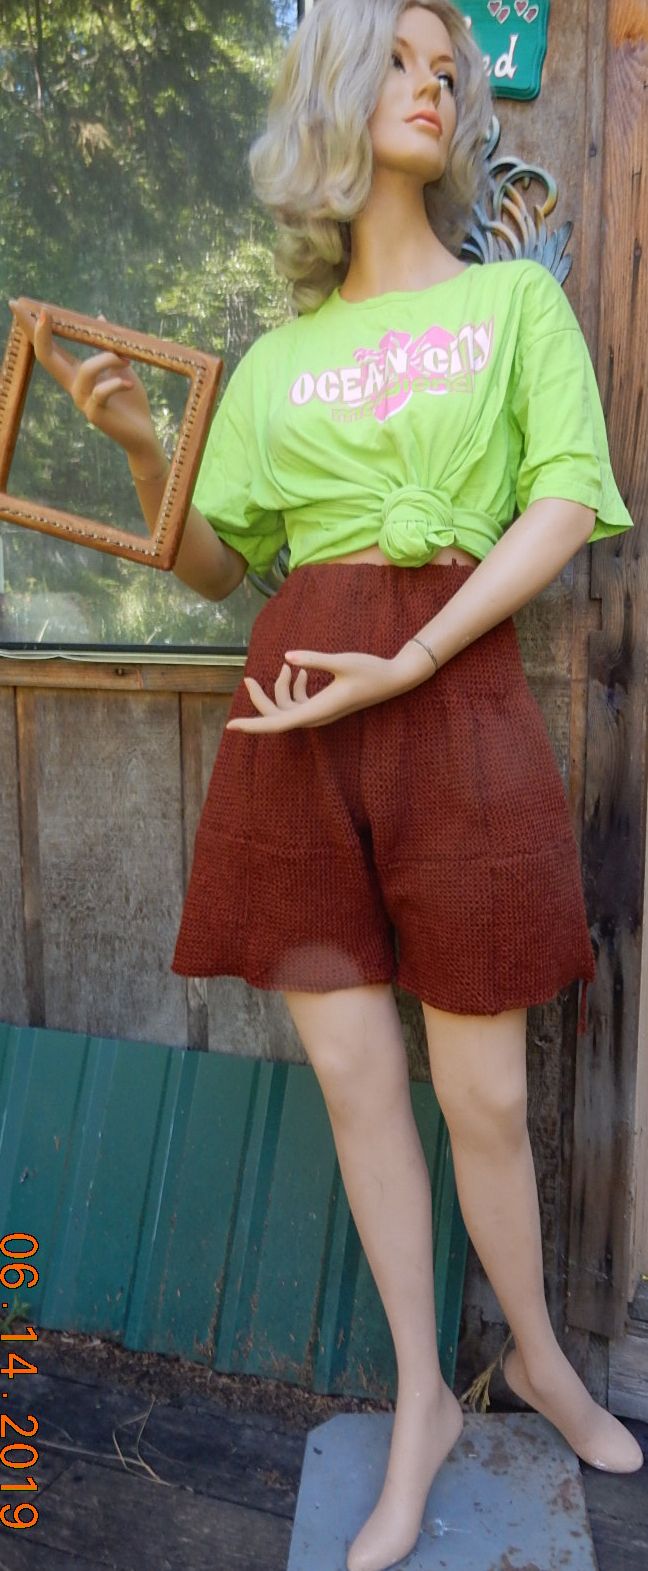
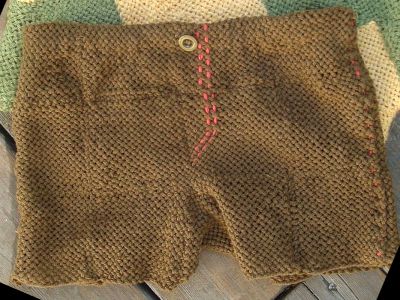
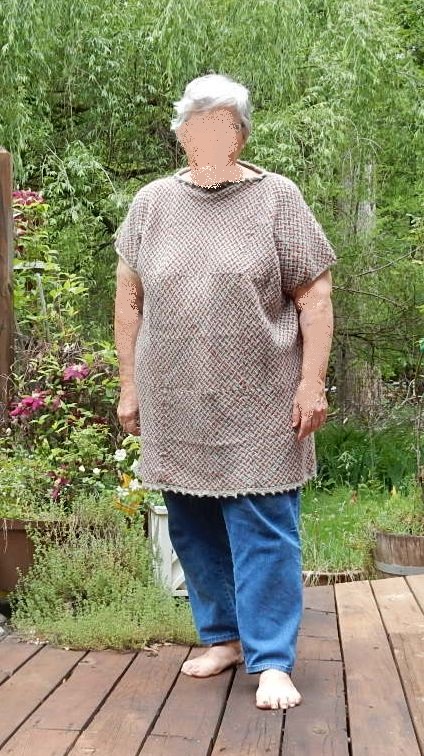
It’s finished. I’m writing all this up with pictures and will save as a pdf and post of the web site, probably. I’ll let you know. Madelyn is thinner so the shorts are a bit blousey on here but you an see that it would also make a nice skirt. I’ll try to find a live model for them.
It starts here …
That’s weave along or design along. I’m calling it Keep Your Pants On! I’ve been getting suggestions to do a WAL to make pants. It’s going to be Along, too, as I will be weaving with you! I hope a few of you will be interested in the project. We’ll start with a pair of shorts and some kiddy pants for those of you who want to start small and have a small one to wear them. I’m going to be posting to the Pin Weaving Support Group on Facebook. and to the Ravelry Small Looms group so you can join in & share in any or all of these places.
—————————————————————————————————————————————————-
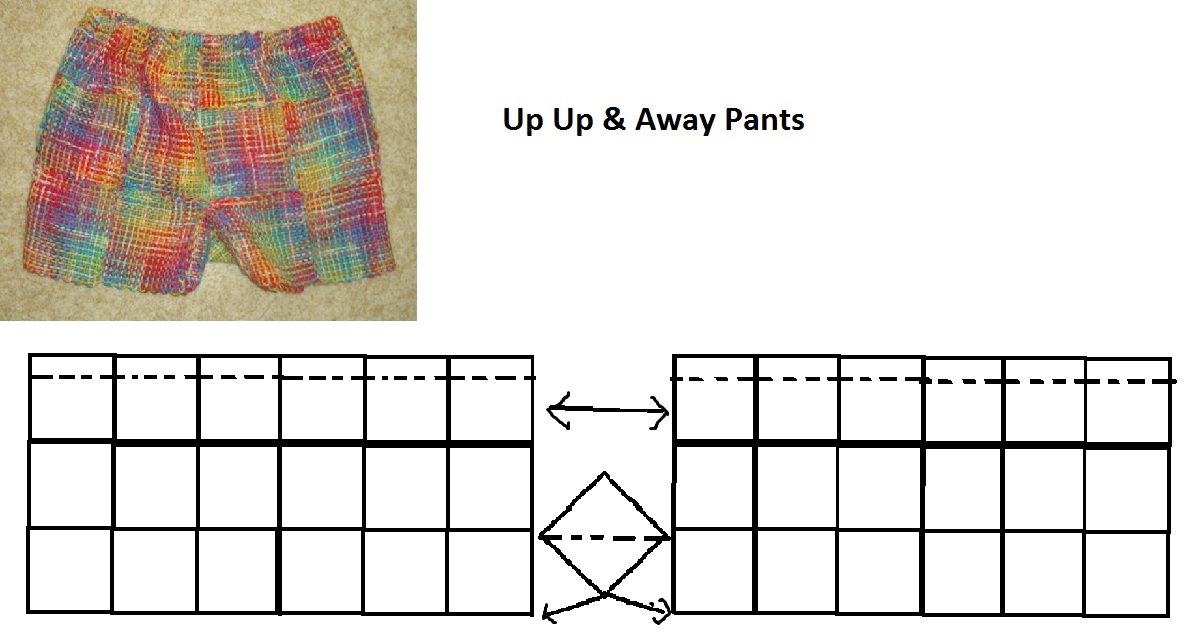
Here’s one of the kids pants projects as a start. A pair of shorts for a toddler boy.
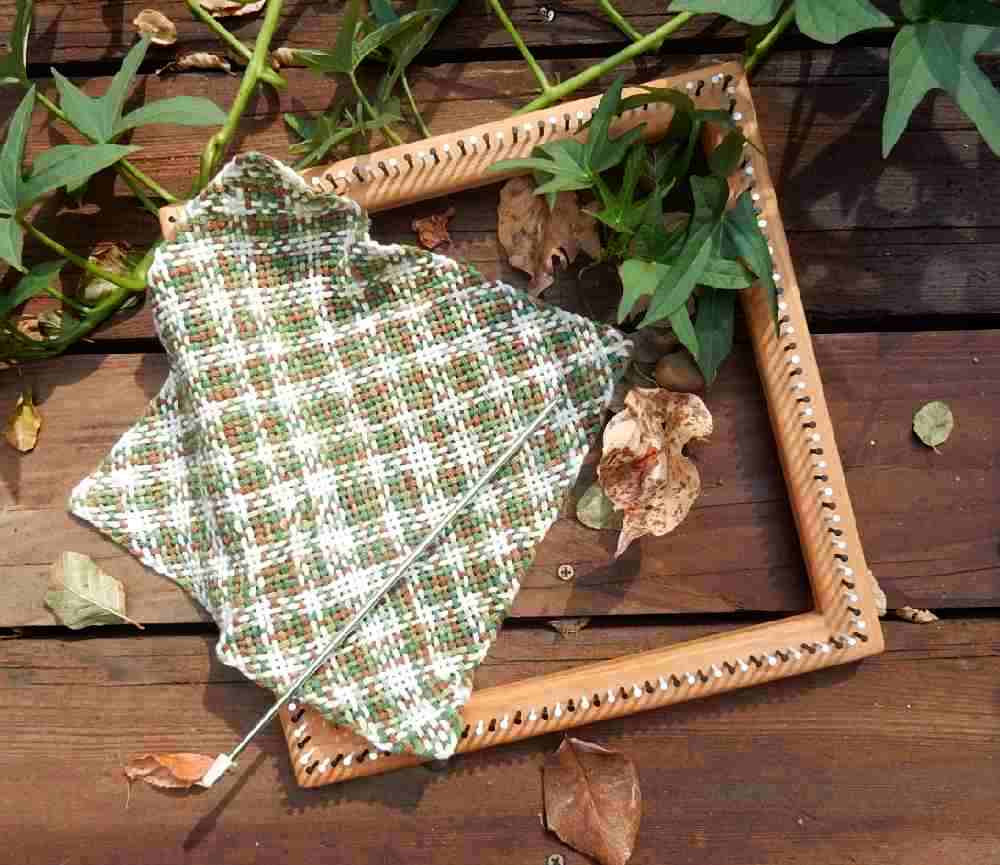
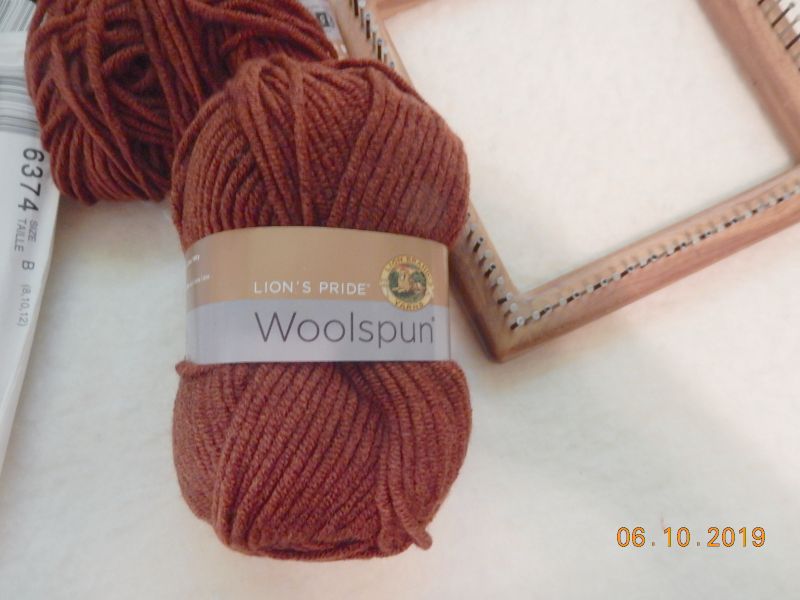
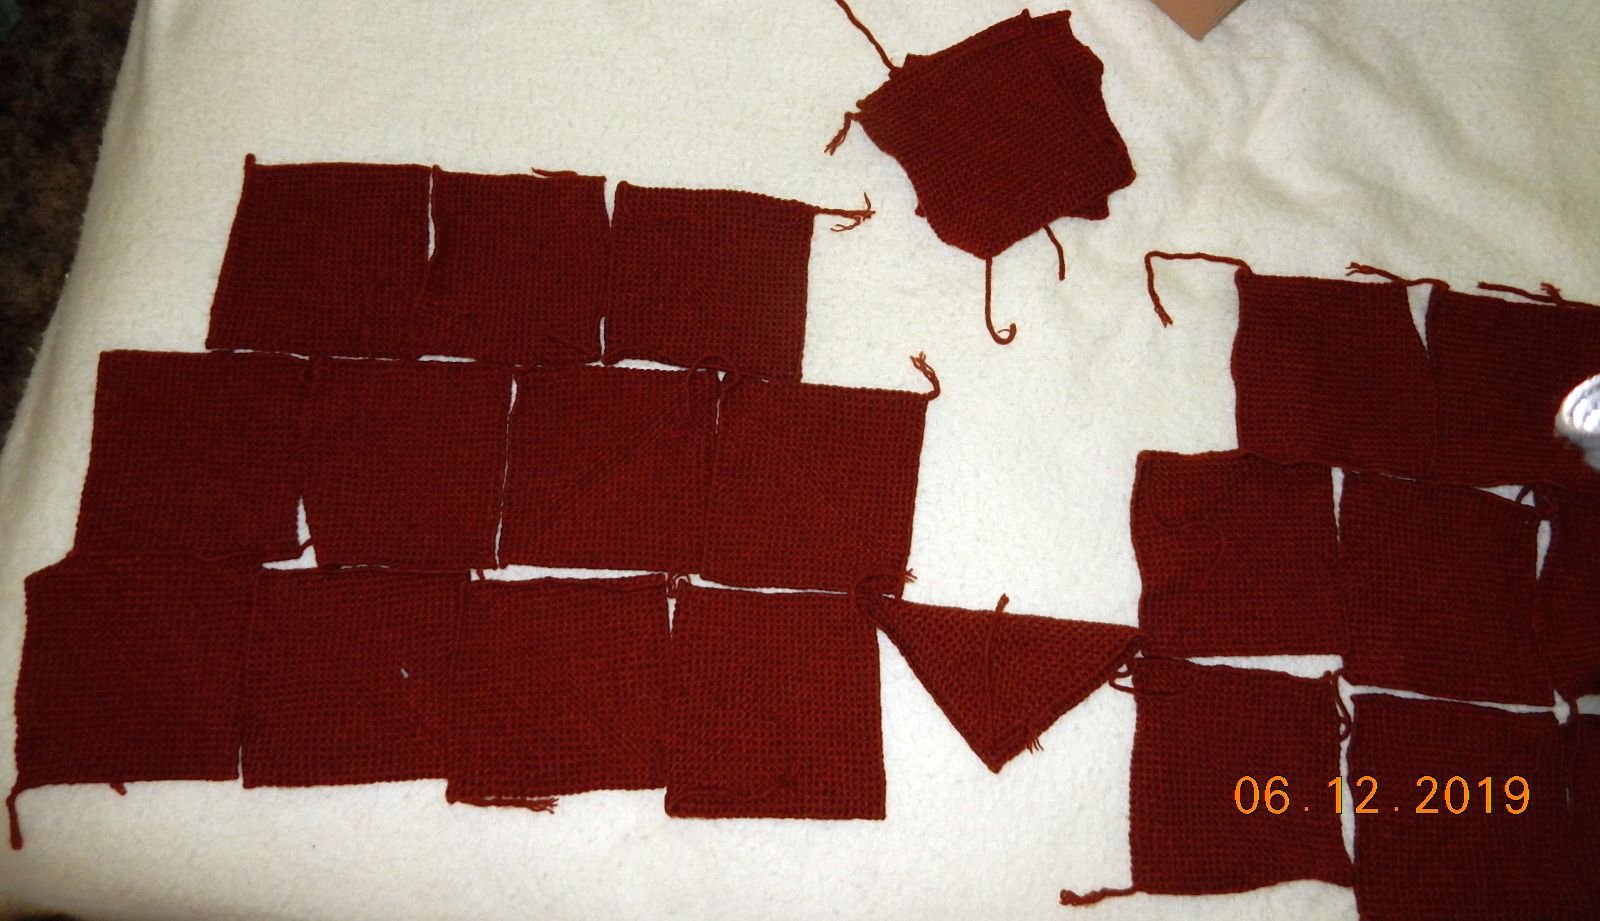
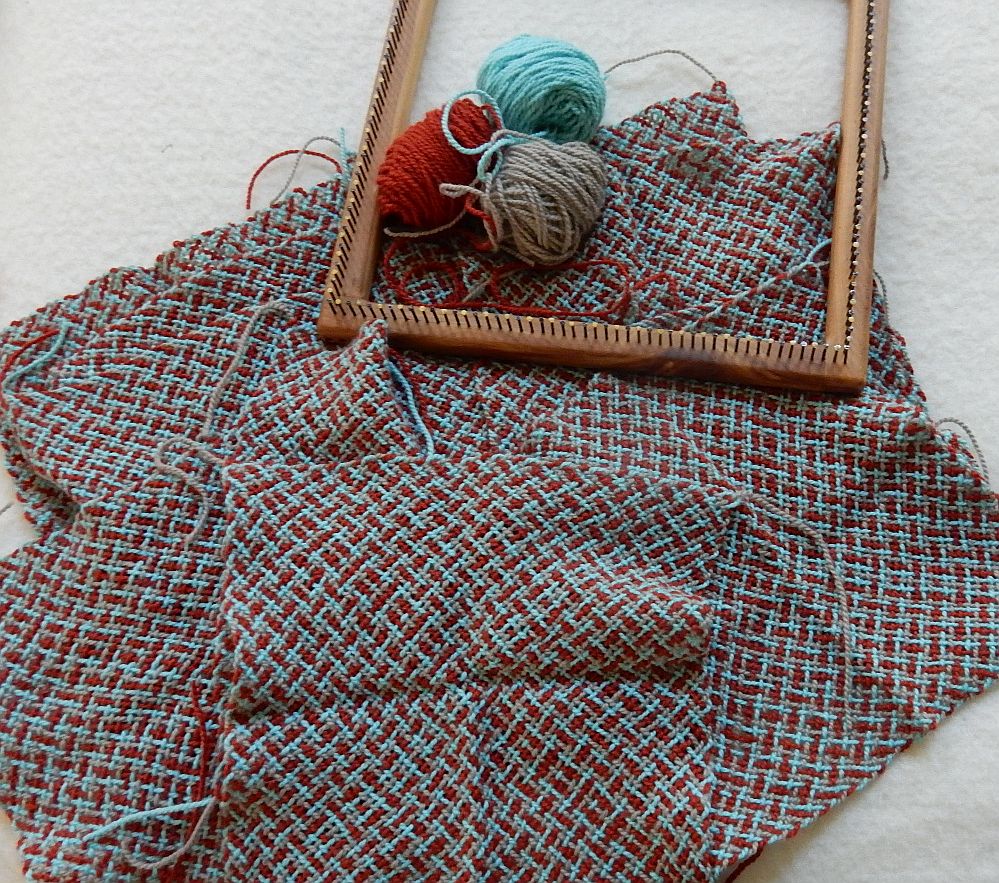
So here’s what I have so far. I tried several yarns on both the Quilt Weaver and the Multi loom and didn’t find anything I liked. I was thinking cotton but the cottons I ave are either too small to make a nice fabric with the Quilt Weavers or too heavy to make it on the Multi Looms. sock yarns were a little too light for my liking on the multi as well. and I wanted a yarn that would not stretch to leave holes once they are on the moving body. I finally ran across this box I got from Lion Brands 10 for $10 sale. Had no idea what to do with it when I bought it but it was a ‘deal’! It weaves up very nice on the 7″ Quilt Weaver square. A snug weave without making a stiff fabric. It’s Lion’s Pride Woolspun, 80% acrylic, 20% wool. A Bulky Woolease.
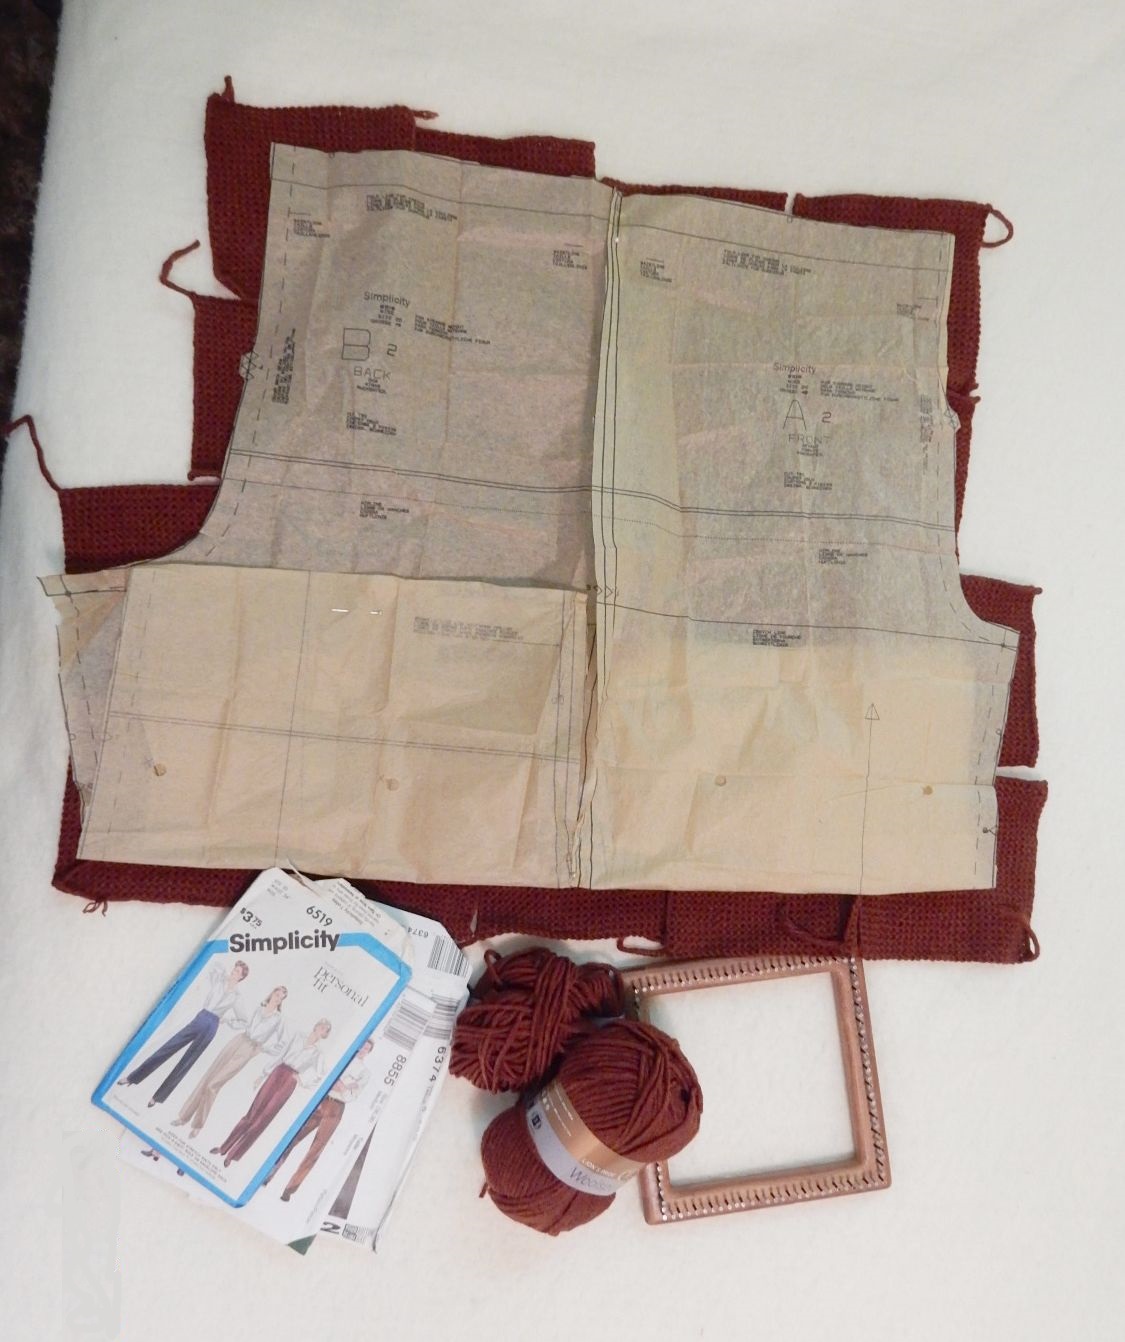
And then I went thought my box of adult patterns and found a pants pattern that I think will work. I folded up the legs and pinned the front and back together. I don’t seem to have one of those ‘one size fits all’ kind so am making my own this way. You’ll need to be sure to measure your hips, usually at or just below your belly button. That will give you the widest measurement. You’ll probably want to add an inch or two of ease for sitting, too.
Here’s my layout for one side. This is 18 seven inch squares. None of my squares are stitched together just yet but I think this is going to work. I will sew these together and then stitch and cut to get the crop correct. Did I mention that you are going to need a sewing machine to do it this way? I have a layout that does it differently but I think this will make a better fit. I’ll share the other way of doing it as well, tho, if you want to try it. It’s basically the same way that the kids pants are done but with a larger insert for the crotch.
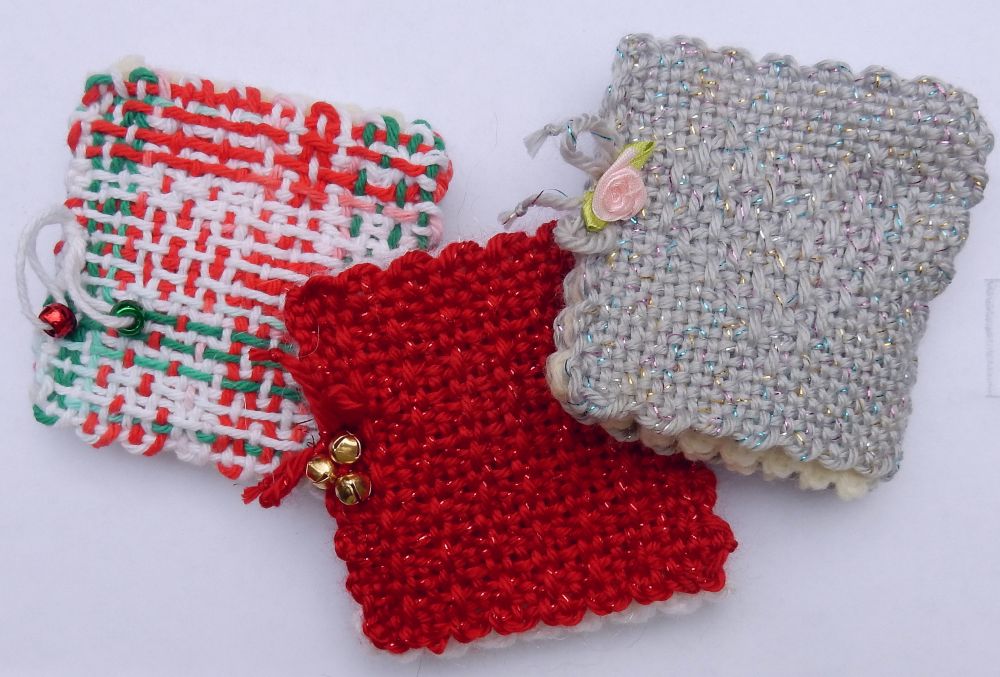
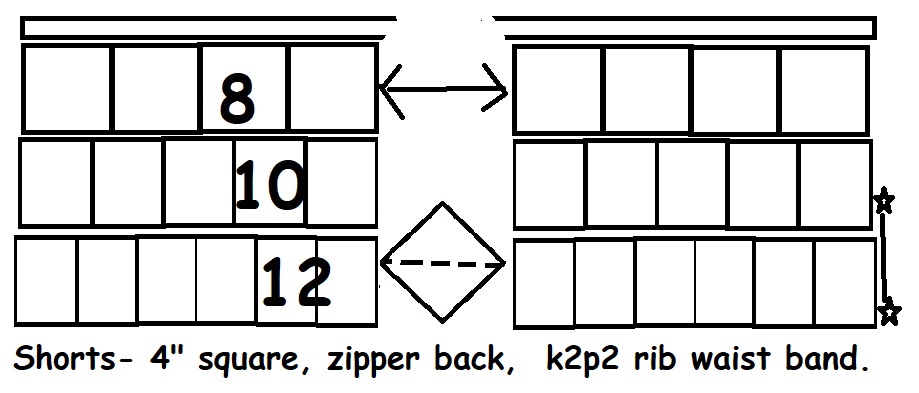
This is Charlies, Pants, done with the 3.5″ Tiny Weaver Square. You could use your 4″ multi but be sure to check the measurements. Add squares top or side to get your fit. This would be for a child. your going to need many more squares for yourself, no matter what size you are and if you are using the 4″ make your crotch insert with the 6″.
Okay this is the basic idea. Decide on your loom. Start asking questions! Start swatching yarns and look for a pattern if you want to do it my way.
————————————————————————————————————————————
Measuring the skirt and play suit results in a rather small size for both, reminding us again that you do need to measure yourself.
The skirt was made to fit my mannequin, Madelyn. A very slim model. The skirt, made with the 6″ Multi loom, measure 26″ at the waist and 36″ at the hip. The skirt was three rows of 7 six inch squares and I took darts at the waist. It was also lined.
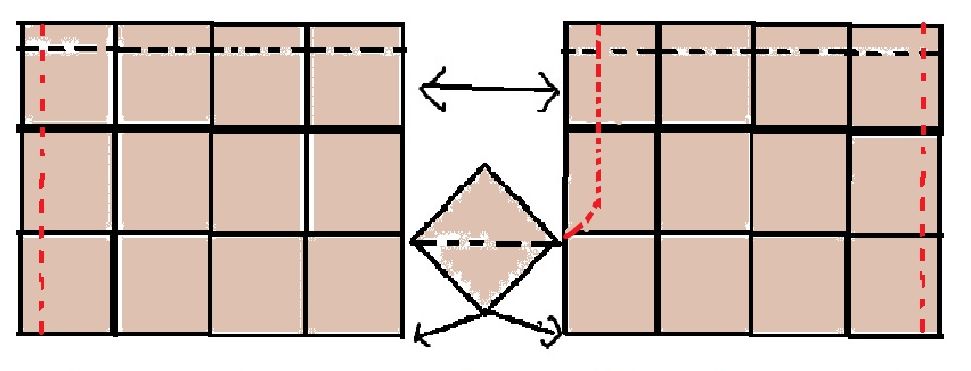
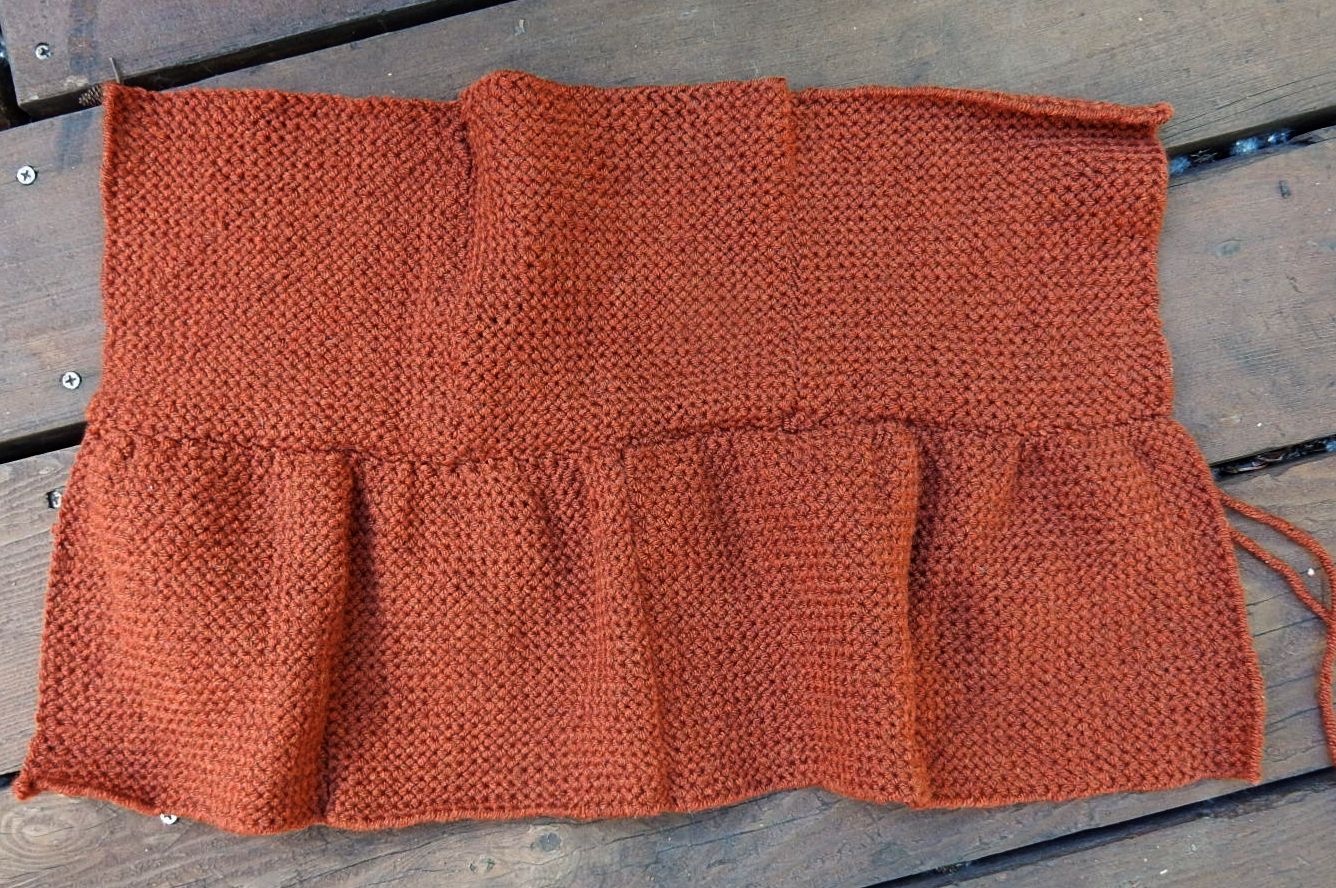
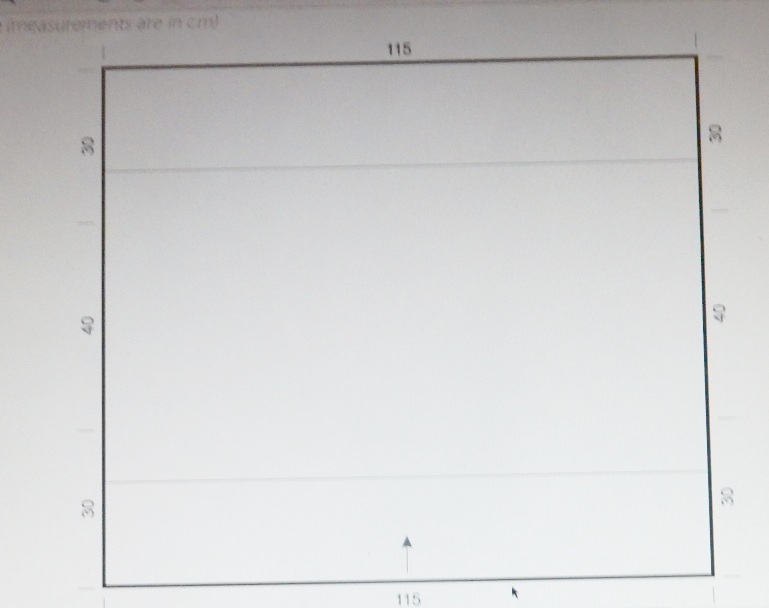
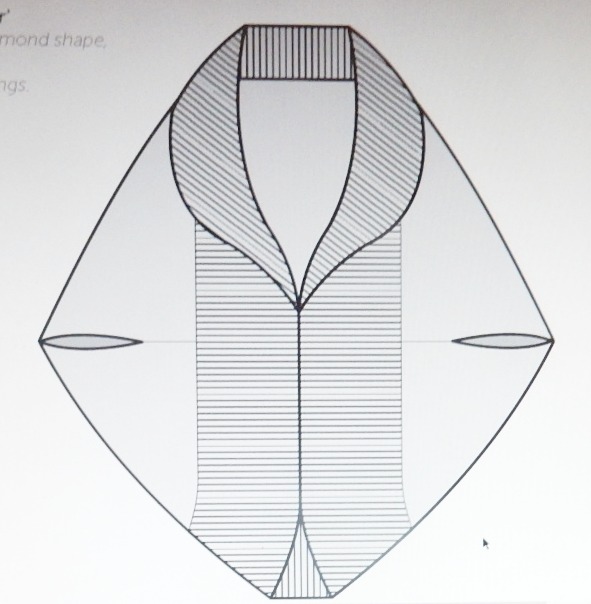
The Play suit, a version of a Weave-it project was even smaller, measuring 26 at the waist and 36 at the hip. This way of doing it has no darts but is tiered as in chart. And you’ll see in the chart that the squares are Not square, This was to show that they are eased in to fit the previous row. It does not look gathered if done carefully.
Take your measurements, from waist to hem and also around your waist and hips. From there you will be able to determine how many squares you need to fit yourself. The crotch square is recommended to be larger, you can try the 4″ or the 6″ & decide which you think works best. Also you might want to make that one a double to give it a little extra strength. The waist band is knitted k2, p2 ribbing. If you do not knit you can crochet it, if you don’t do neither you can just weave an extra row of 4 in squares , sew together in a waist length row, fold them lengthwise and stitch it on as a band.
Now as I have had questions about how to assemble this crotch, I’ve changed my mind about how I’m doing it and will do it the flat way. My square measure 6″. So laying them out with 3 squares will give me a 36″ waist. But if you have a 36″ waist, you are not likely to also have 36″ hips. Well, men might but women aren’t likely to. If I manage to ease in one more square it will give me 48″ hips. That also makes the leg opening 24″ which may be a little loose for shorts. All these things have to be adjusted by your size and your taste. This is where the design comes in! And do remember!!! You are not weaving squares… you are weaving Fabric! You can treat it like any other coarsely woven fabric. You’ll need to sue some kind of stay, whether iron on backing or just sewing a stay stitch, before you cut. I am going to start assembling these shorts today and will take photos of inserting the crotch gusset.
Next Day:
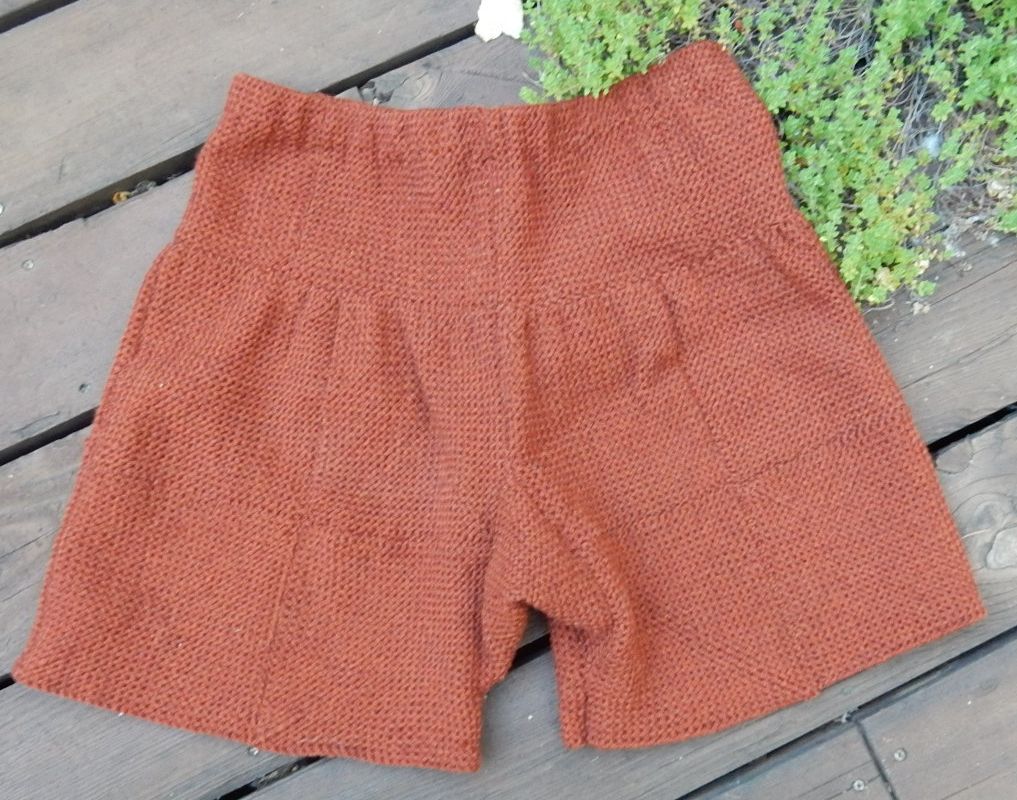
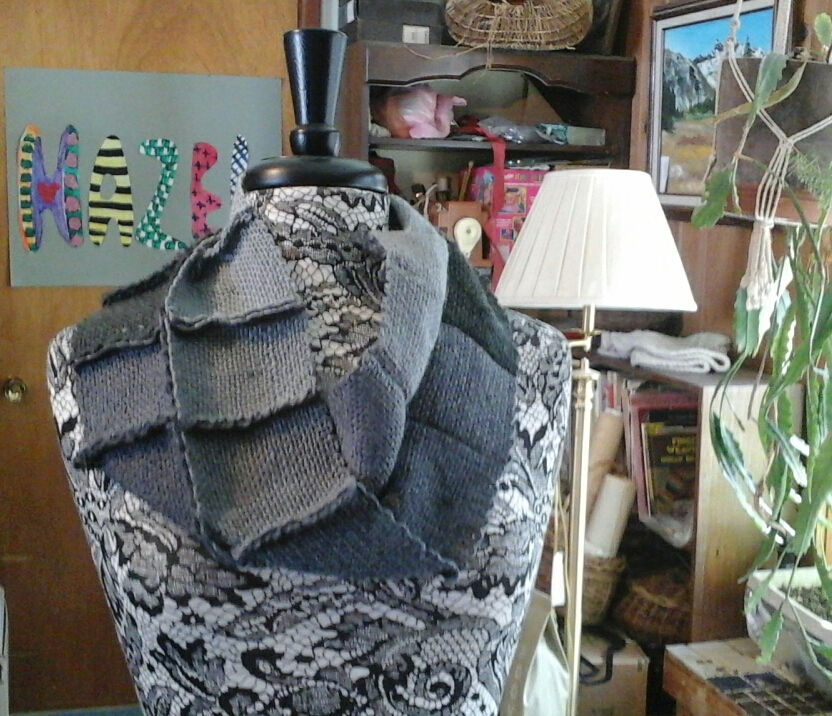
I’m not really happy with the way this is going. The project, that is. This yarn makes some nice sturdy, yet soft fabric but trying to ease in an extra 6 inches isn’t going smoothly. I’m going to go ahead with it, bit I think I won’t weave in ends just yet in case I have to frog it later. A lighter fabric wouldn’t be a problem, I think, so don’t be discouraged by my comments. I’ll post another comment & a photo once I get the next tier on.
I guess it could be cute. We’ll see. I have not yet added the 3rd tier, which I’ll try to get done today.
More Finished UFO’s
Okay, I’m late posting again but it is June, busy weather as I’m sure you know. Got the garden Mostly in, but it keeps going from cold and wet to blazing hot, not good for gardens or people! Today is over cast but not raining. Yet. Forecast is for clearing and moderate temps. I’ll believe it when I see it…
…Like you do with my promised posting! Ah well. I frogged the supposed shrug as it was a garment no one could wear. Now it’s just a plain tunic, comfortable but not very flattering for me. There is no shaping, I could not find a belt but as I have no waist, I’m not sure that would matter. I thought of letting Madelyn model it but it’s way too big for her.
But here it is laid out flat. The neckline was a picot, bind off. The sleeves an applied I-Cord. The hem also Picot bind off. I picked up the stitches, knit around and then worked the BO.

Picked up stitches, worked 3 rows of stockinet- knit side inside so it would curl to the right side and then the Picot Bind off.

Picked up hem stitches then knit in the round one round and bound off with the picot stitch. I didn’t want this one to curl.
And I found an anonymous old lady to model it. I think I need some sleeves under but this yarn does not sit well over clothing. It sticks and refuses to drape as it should. Works like your old sunday school flannel board! lol But this yarn is soooo comfy! Even tho it isn’t really a flattering garment I might wear it a lot just because it feels so good! I am at least happy that I finally found a use for all those squares and that lovely yarn. Now I just have a vast selection of demo squares to make into something. And as we are coming up in fair season again I think I should plan a bit better with yarn choice so that I have a better chance of actually using the squares I weave while showing folk how it’;s done.
It was suggested I do a WAL for making pants. I wasn’t thrilled with the idea but I saw a pair this morning somewhere that I think just might work this way. I wonder if I could possibly find that photo again… What’s chances? lol
School Weaving
Had 5 kids at the table, 2 boys & 3 girls. One 1st grader, 1 6th grader and three in the 3rd. Small schools are interesting and fun! They all did well and finished their little rug. They took the cardboard loom and the wooden needles that Randy and I made home with them, hopefully to get used again. I wouldn’t mind doing more with them.
My first grader drew this tiger for me. He says Thank You! lol
Ellie’s mom posted this the next morning. She says, “Ellie is weaving at breakfast this morning! Thanks again for sharing your skill.” Love it when they vole it!
Another project.
Been meaning to make another one of these for some time now. Gabi’s WAL got me inspired. The only towel in my stash was one I got for xmas from my $store shopping MIL a couple years ago. I just happen to have some kitchen cotton in the green-ish colors of the wreath. So here it is. I worked a slip stitch up from the outside bottom of each tri to kind of reinforce the edges for the tie string to hang from. The ends are sewn into the hems where I stitched the tris to the towel. The towel is cut about 2/3 of the towel and cut edge zig zagged, then gathered this time. I fitted it to the edge of the tri and pinned closely and sewed it down, on the back side first, then the same on the front side. Then stitched another row about a half inch above that to encase the raw edge of the towel. This one has not been washed yet so you may see some ends that will be clipped later.
This is a photo of the first one I made before I chained on the tie strings. It is no longer photogenic! lol But it’s been very handy and is still working despite it’s less than stellar condition. This one was pleated rather than gathered. You can do the dame thing with the towels you weave, too. But this is a quick project. They make nice gifts as well.
I’m still working on the idea for an apron.
As I promised…
I finally found some buttons for the vest I posted earlier and I promised to show it on at that time so here it is.
One thing I am happy about is the back view. It actually hangs at my waist instead of halfway up my back. I did some asking from Tech knitters about this issue with my “hump” and got some good advice on fitting. It was a matter of extending the front shoulders just a tad and cutting the back neck lower. It made a great difference from the last ones I have tried. My shoulders sit at my shoulders and the back at my waist! I added a couple short rows to the ribbing in back just to make sure. Not happy with my figger but am pleased with the fit. If the WIP does as well I’ll be doubly happy!
Up next is…
It was supposed to be my new sweater but was not working out for that. I bought this alpaca yarn on a good sale as it was being discontinued so I have a limited amount to work with. It’s Blue Sky, I’m sure I can get more. I think it was just the colorways that were being discontinued. Anyway, I think I found a way to use all these 12″ squares. It’s a knitting pattern but so simple that it will work for the squares. It’s just a matter of will it fit me?! I’m forging ahead and hoping for the best! lol
So here’s my layout. I have enough (I hope) Navy to knit the ribbing. If not I also still have some of the colors so it could be as colorful, almost, as the squares. Well, these are the blocks but I cannot get a picture of my present layout. It’s a camera issue. But this one is going to take awhile as I did not weave the ends in as I went. I’m sure I have advised you to do so, in the past. I guess this is another case of “do as I say, not as I do!’ lol It will be sewn together with an overhand stitch. Pinned each time to avoid stretching out of shape. It’s a very soft yarn. Soft and drape-y.
The other thing is that it is also getting toward gardening season. The rain (knock knock) has stopped and the sun is out. Water is quite high in streams and the lake. We’ll have a full lake this summer! Took a ride north yesterday and got a picture of Scott Mountain creek! It hasn’t run like this in years! I wish you could hear it as well. It was Roaring!! Love it! all the branch creeks and seasonal streamlets were adding to it and by the time it reached the Trinity River and on down the canyon to join Coffee Creek, that one was roaring as well! But CC does not seem close at all to flood tho a lot of people who have moved up here in recent years may be a bit anxious since they’ll never have seen spring run-off.
Another one done!
This one I’ve learned to hate! I’ve assembled and frogged and reassembled and frogged… So what do you do then? Something that can’t, at least easily, be undone. Get out the Singer! So here is the Singer Infinity Cowel. Done & finished.
It’s been so long-3 years, I think – that the band is gone & I’ve no idea what it is. A nice yarn… just wasn’t working for me.
I’m beginning g to feel a bit more like I may live. Still not over it, but better. Himself has it now, of course.
Another one done.
This is some handspun, a soft fluffy yarn, cannot of course remember what. I really do need to label stuff, but finished assembling the triangle cowel and wanted to weave a hat to go with but didn’t have enough of that yarn left so I knitted a head band. Which, as you will see, does not really work for me. lol I need a pretty young model! But none the less, if you have long hair this may work well for you . The cowel consists of twelve 7″ triangles sewn together with the faggoting stitch, in this case. Pretty fast and easy to make.
The headband is a reversible cable. I modified from a scarf pattern. Cables don’t show up very good here.
CO 12,
1. Seed for 4 stitches them k1p1 for 8 stitches, and 4 more seed for the border.
2. Seed for 4, knit the knits, purl the purls for 8, seed 4. Work 8 rows and cable the 8 center stitches.
Repeat as long as needed.
I’d suggest working just 4 rows before the first cable so as to be able to join away from the last cable, If you are good at kitchner that would make it truly reversible. I am not so just did the knit together cast off, making mine a little less reversible.
So today we are photographing the looms for the new web page but I’ll get to the next one once we finish this. meanwhile, hoping my cold is on it’s last legs– or I might be! lol


